
Ready for a DIY bathroom makeover? With the house painting nearly done, we’ve begun looking at the (many) other projects that need to be completed inside the inn. One of our top priorities is updating the bathrooms, most of which look like they were last renovated somewhere around 1964. Think salmon pink, if you are having trouble visualizing. Of course, it is not just the tub or shower, but most if not all of the walls are tiled, including the half bath.
Both the Dogwood and Poplar bathrooms were tiled in colors that are, shall we say, slightly dated. Or hideous. You pick. Since we weren’t sure how the tile painting was going to go (the only thing worse than faded salmon pink tile is faded salmon pink tile with peeling paint over top), we decided to start with the half bath since this could, in the worse case scenario, be locked up, never to be seen again.
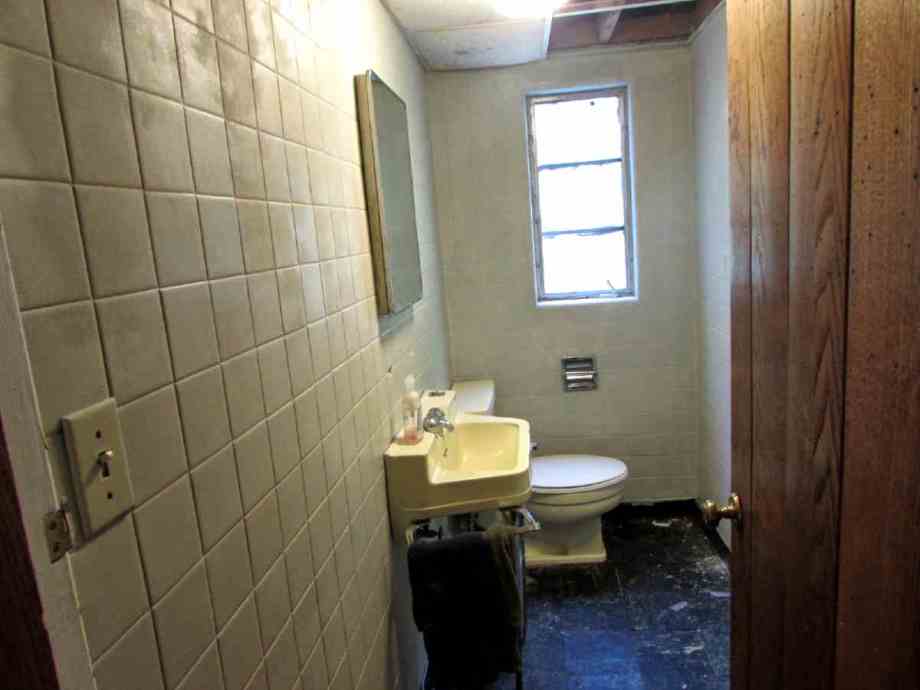
Tearing out tile is expensive and, since we haven’t won the lotto yet, we have been looking at some cheaper options. The handy Innkeeper stumbled across a product called Spreadstone. In just 5 (relatively easy) steps, you are supposed to be able to transform tile, floors, and counter tops. Hmm…well, we’ve got all three to fix, so why not? We purchased a tile refinishing kit and got to work on our first DIY bathroom makeover. First, the before shot:

Yup, seafoam green tile (at least, I assume that’s the color it started as), peeling linoleum, and that sink is especially awesome. Holes in the ceiling are not original but courtesy of a leak that started about three minutes after we bought the house.
Wait, wait, stop screaming! I told you it was last touched in 1964. We figured anything would be better than this, so we started in on the paint.


And, all done…except for sink, mirror, floor, ceiling, light fixture, and window. So, moving on!
Much to our delight, the paint worked, looked decent, and even after a few months, is still holding strong. It can be scratched – the handy Innkeeper took a gouge out while trying to install the new ceiling – and it is tricky to patch since you have to redo all five layers of paint, but it is a great product considering the price point. So…here we have a bathroom with nice looking walls, but the same peeling laminate, drop ceiling, and 1964 sink. We can totally let that go, right?
Hah! Well, it’s a small room, we thought, this shouldn’t take too much time or money, right? Right?
Are you done laughing yet?
First things first, we took out the old hand sink and we ripped up the laminate. The floor in that section of the house is slightly bowed, so we started off by pouring a floor leveler, then we installed a dark wood style ceramic tile.


Next up, we built a new vanity and then lucked out with this fantastic glass vessel sink for the top. We painted the vanity dark brown to match the floor.


Demolition continued with the removal of the mirror and the drop ceiling. The door was also taken off. One side was covered with chestnut, so we removed that to use in repairing the walls in the Cherry Blossom room and the door was refinished and painted the same dark brown as the vanity.
The handy Innkeeper cut another of the full length mirrors down and made a beautiful mirror for above the sink, and the artsy Innkeeper made a shade for the window and painted the window trim to match the rest of the room. Just two months, a new ceiling, some trim and crown molding, and a new light fixture later, and….

Y’all, this DIY bathroom makeover has taken the room from being one of the worst rooms in the house, to my absolute favorite. And for those keeping score, that’s two bathrooms down, four more to go, and just five months until our projected opening date.