
One of the hardest things about renovating an old house is deciding what needs to be replaced with new and what can and should be salvaged instead. New is always easy but sometimes restoration can be worth the extra time and money.

At the beginning of the year, we replaced thirty five windows in the Inn, that’s nearly every single window except for the large picture windows in the main room and a couple in the basement. The windows in the house were old and in poor condition, with little hope of restoration. They had smaller panes of glass and many times painted metal frames. One of the windows, though, was a casement style that had been stuck closed since we moved in. It was wood framed and about two feet wide and four feet tall.
We salvaged it and I immediately thought of turning it into some of sort of picture frame, probably a collage of smaller pictures since the window was so large.
After a few months of working on other projects, we dug the window back out and started cleaning it up. First was the removal of a whole lot of dust and spiderwebs, then I sanded the frame lightly. The outside of the frame is heavily coated in paint, but the inside is just wood and cleaned up nicely. Since the exterior will face a wall, I sanded just enough of the paint to smooth the chips.
I restained the frame, using ebony to bring out the nicks and dings, and a lighter maple to even out the color. Then I washed the whole thing in driftwood to give it a little bit of a smoky finish and some grey tones. Last was a layer of wax to seal it all in.
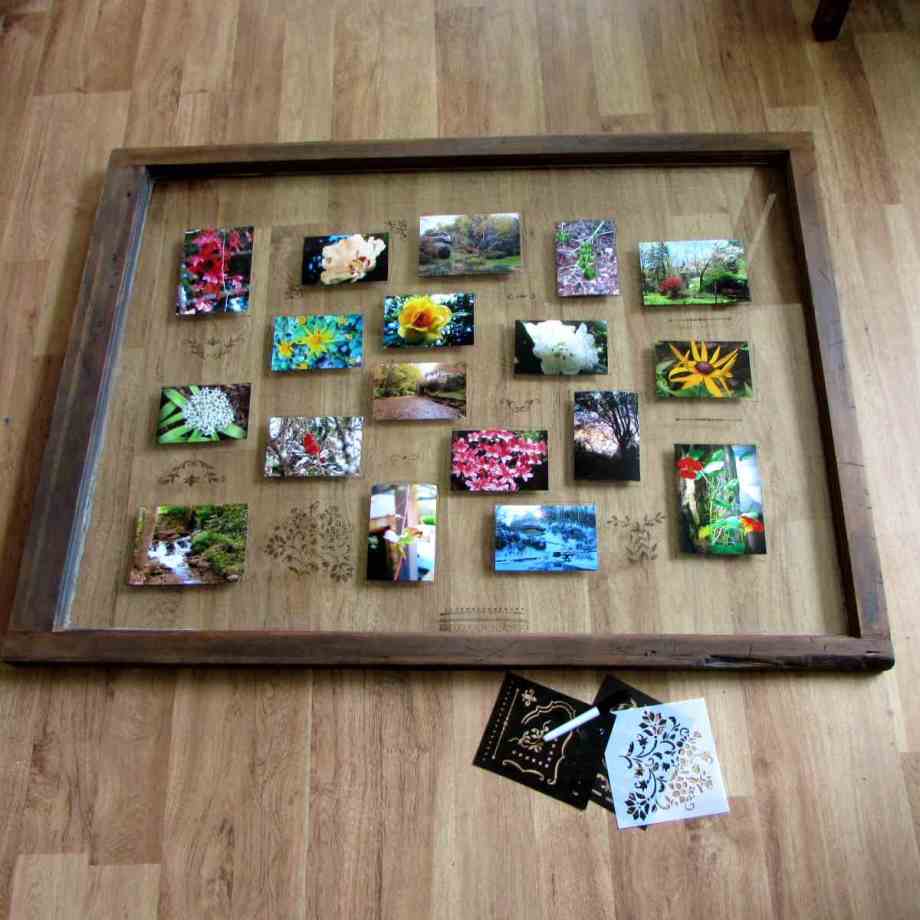
Then (after cleaning the glass again to get rid of all the stain smudges) I started laying out pictures to see how the collage might work. The large expanse of glass was harder to fill than I first imagined, so I thought first about giving the glass a faux mercury finish around the edge to take up some of the space. I was worried that would make it too opaque to see the pictures through, so then I thought about frosting the glass instead. In the process of that, I discovered glass etching.
Using acid, glass etching cream will permanently etch glass rendering it more opaque than unetched glass. So I picked up a bottle of the cream along with some new stencils and stencil adhesive and set to work deciding my design.


I laid the pictures out again and then started tracing the stencils onto the negative spaces using a dry erase marker. I also used the dry erase marker to trace around the pictures so I would remember where they went. Next I taped off a narrow border around the edge of the frame, partially because the frame is very narrow for the size of glass and partially because some of the paint on the reverse side was still visible and I was hoping to hide it a bit.
Once I was happy with the arrangement, I removed the pictures and flipped the frame over to mark the placement of both stencils and pictures with the dry erase marker on the reverse side. Then the front of the glass was erased with first plain window cleaner and then rubbing alcohol. Some window cleaners (especially those that say they resist fingerprints) can leave a film that inhibits the etching. Perfectly clean glass means even etching.
Then came the fun part – the etching. I applied stencil adhesive to the backs of the stencils and then firmly adhered them to the glass. There are special etching stencils, but I used regular painting stencils. If you plan to etch a lot, using a stencil made to hold up to the acid is advisable. Just make sure they are completely adhered or the etching cream can get underneath the stencil and blur the image. After waiting a few minutes, I removed the stencil and wiped off the cream with water.
Once the etching was done, I attached the picture using black photo album corners and cleaned the dry erase markings off the reverse side. And we have a little piece of our old house restoration preserved for the future!